What is aureport?
aureport is a command line utility used for creating useful summary reports from the audit log files stored in /var/log/audit/. Like ausearch, it also accepts raw log data from stdin.
It is an easy-to-use utility; simply pass an option for a specific kind of report that you need, as shown in the examples below.
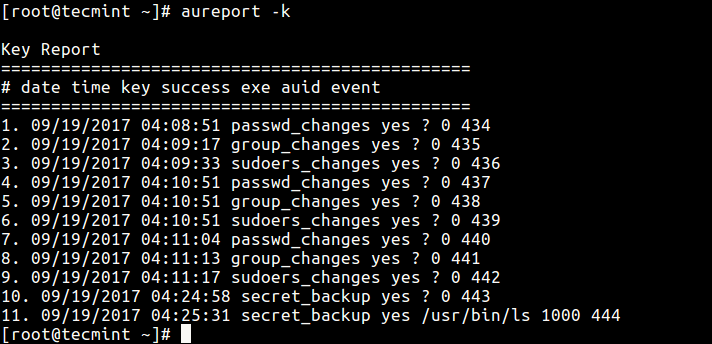
Create Report Concerning Audit Rule Keys
The aurepot command will produce a report about all keys you specified in audit rules, using the-k flag.# aureport -k
Report Audit Rule Keys
-i option.# aureport -k -i
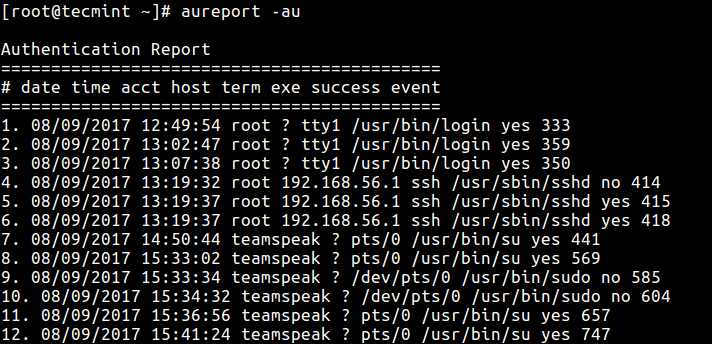
Create Report About Attempted Authentications
If you need a report about all events relating to attempted authentications for all users, use the-au option.# aureport -au OR # aureport -au -i
Summary of Login Authentication
Produce Report Concerning Logins
The-l option tells aureport to generate a report of all logins as follows.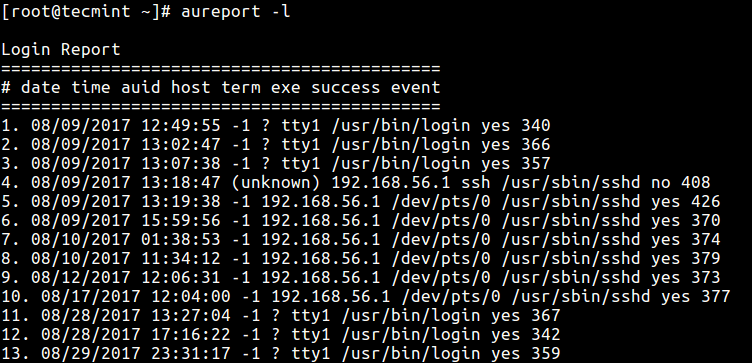
Check Login Authentications
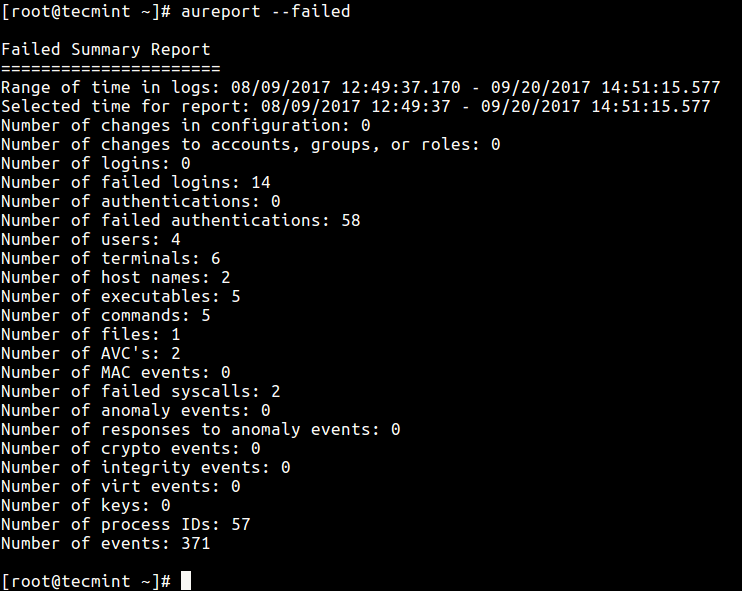
Report Failed Events on the System
The following command shows how to report all failed events.# aureport --failed
Report Failed Events
Generate Summary Report for a Given Time Period
It is also possible to generate reports for a specified period of time; the-ts defines the start date/time and -te
sets a end date/time. You can also use words like now, recent, today,
yesterday, this-week, week-ago, this-month, this-year instead of actual
time formats.# aureport -ts 09/19/2017 15:20:00 -te now --summary -i OR # aureport -ts yesterday -te now --summary -i
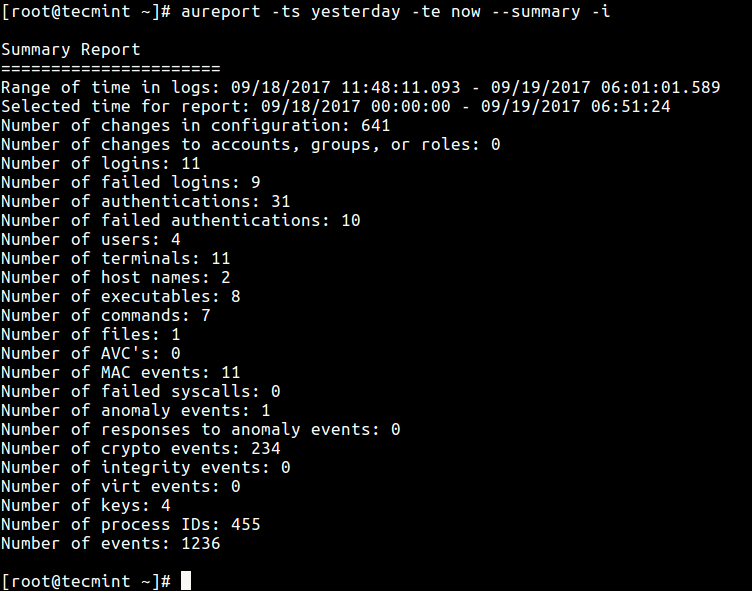
Generate a Summary Report
Produce report From Different Audit Log File
If you want to create a report from a different file other than the default log files in /var/log/audit directory, use the-if flag to specify the file.This command reports all logins recorded in /var/log/tecmint/hosts/node1.log.
# aureport -l -if /var/log/tecmint/hosts/node1.logYou can find all options and more information in the aureport man page.
# man aureport
Comentários
Postar um comentário